Drain Pan: Standing water if drain is slow or blocked
Air Filters: Trapped dust and moisture
Ductwork: For centralized systems, hidden mould growth
📷
Aircon-related mould? Send a photo.
WhatsApp a photo of your aircon trunking, ceiling, or wall stains. We'll advise honestly whether servicing, remediation, or full prevention is the right fix.
No hard-selling. Transparent pricing. Reply within working hours.
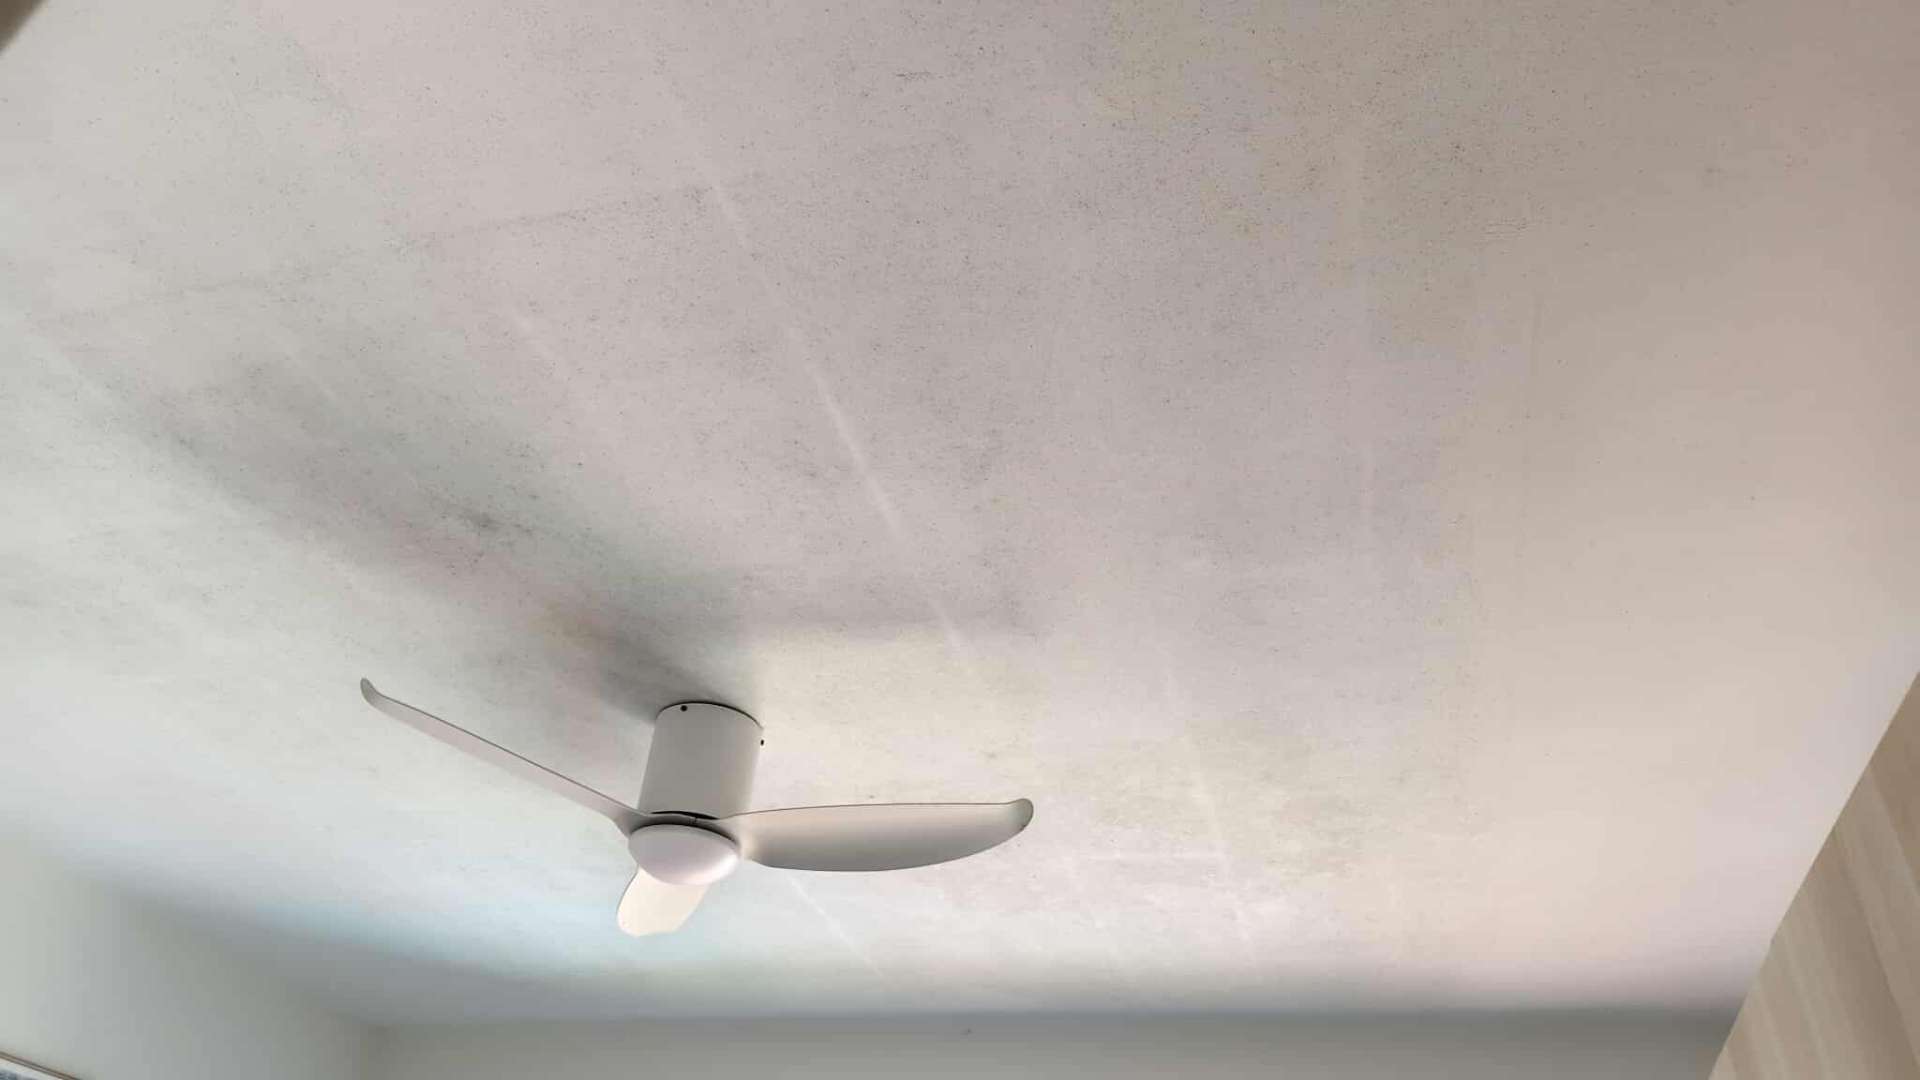
Signs of Aircon Mould
Musty or mouldy smell when aircon runs
Visible black spots on vents or blades
Respiratory symptoms when in air-conditioned room
Allergies or headaches that improve when outside
Reduced airflow or cooling efficiency
Prevention Tips
Service aircon every 3 months
Annual chemical wash for thorough cleaning
Set temperature to 23-25°C (not too cold)
Run aircon in dry/dehumidify mode occasionally
Ensure proper condensate drainage
Clean or replace filters monthly
Keep room ventilated when aircon is off
Frequently Asked Questions
Why does my aircon smell musty?
Musty aircon smell usually indicates mould growth inside the unit. Mould grows on the blower wheel, evaporator coils, or drain pan where moisture collects. Regular servicing is essential to prevent this.
How often should I service my aircon to prevent mould?
In Singapore, service aircon every 3 months for residential use. More frequent servicing (monthly) for units running 12+ hours daily. Annual chemical wash or overhaul is recommended for thorough cleaning.
Can aircon mould make you sick?
Yes, aircon with mould blows spores directly into your room and breathing zone. This can cause respiratory issues, allergies, headaches, and worsen asthma. Children and elderly are especially vulnerable.
What temperature should I set to prevent mould?
Setting aircon between 23-25°C is optimal. Extremely low temperatures (18-20°C) cause more condensation and can create cold spots on walls where mould grows. Moderate cooling with good airflow is best.
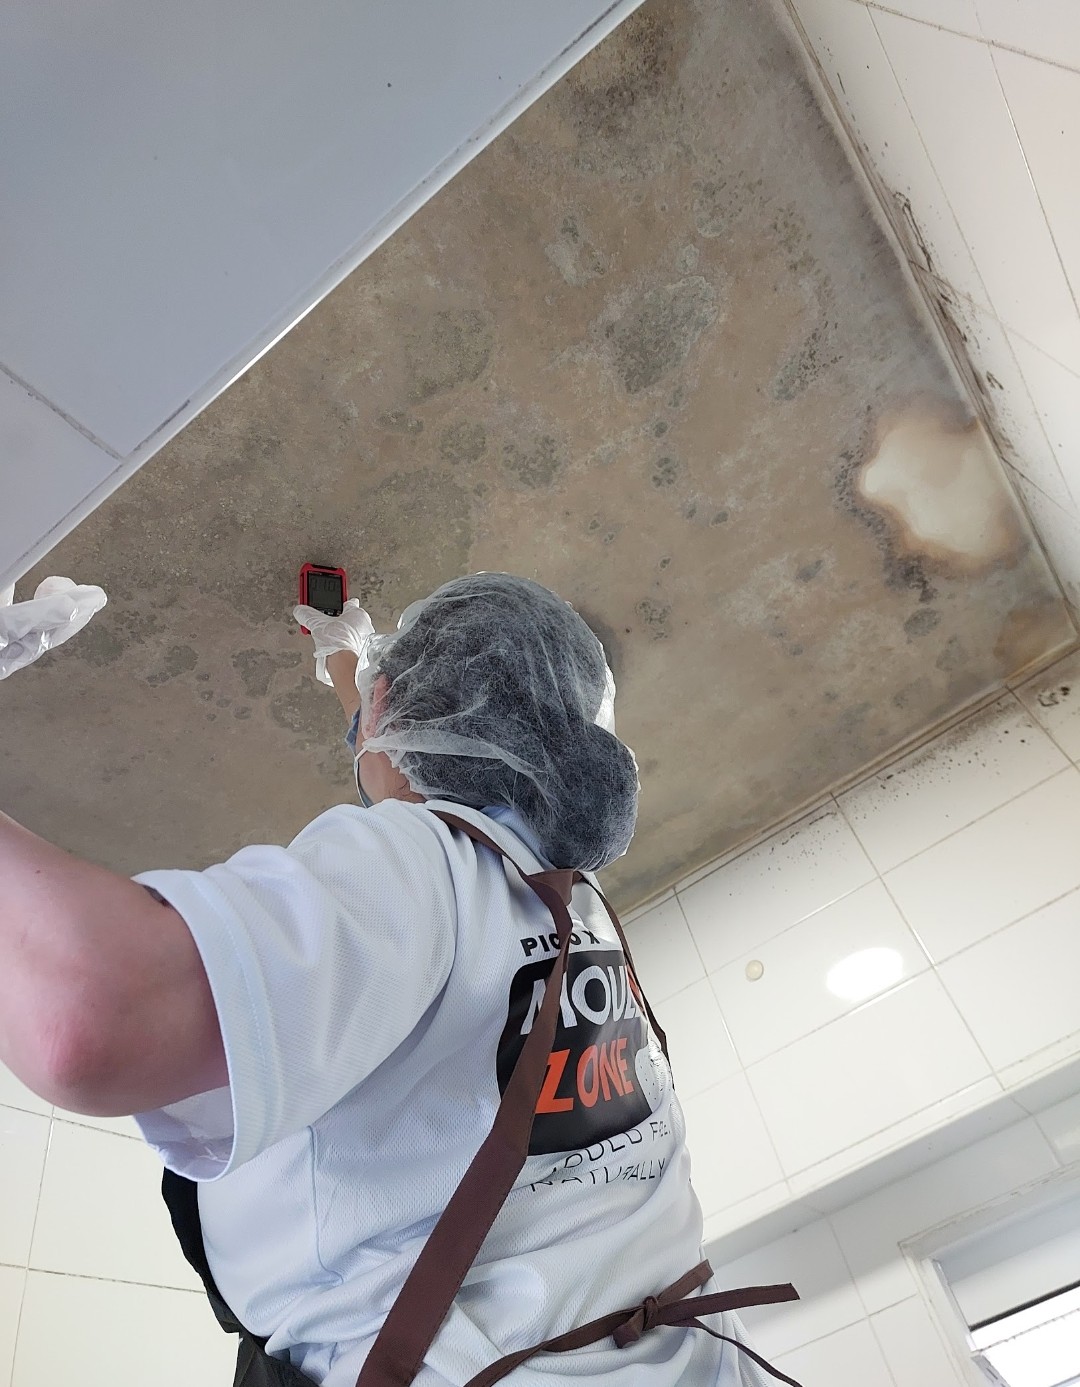
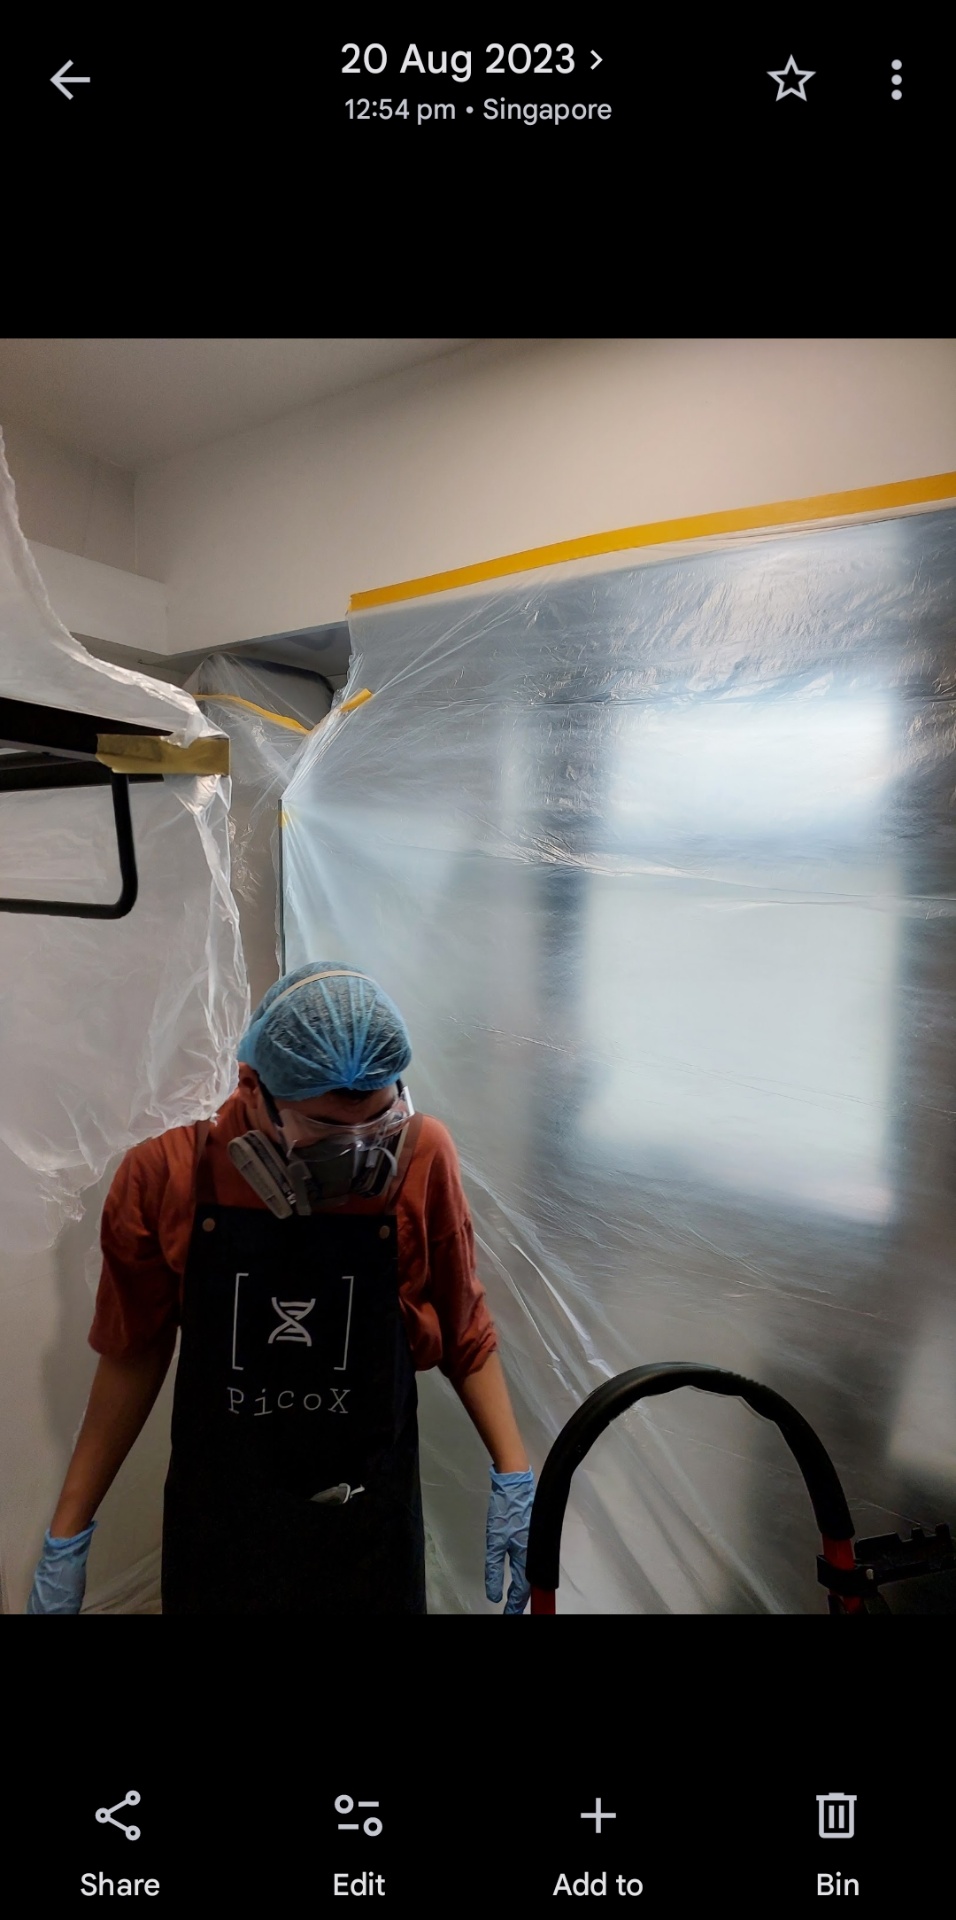
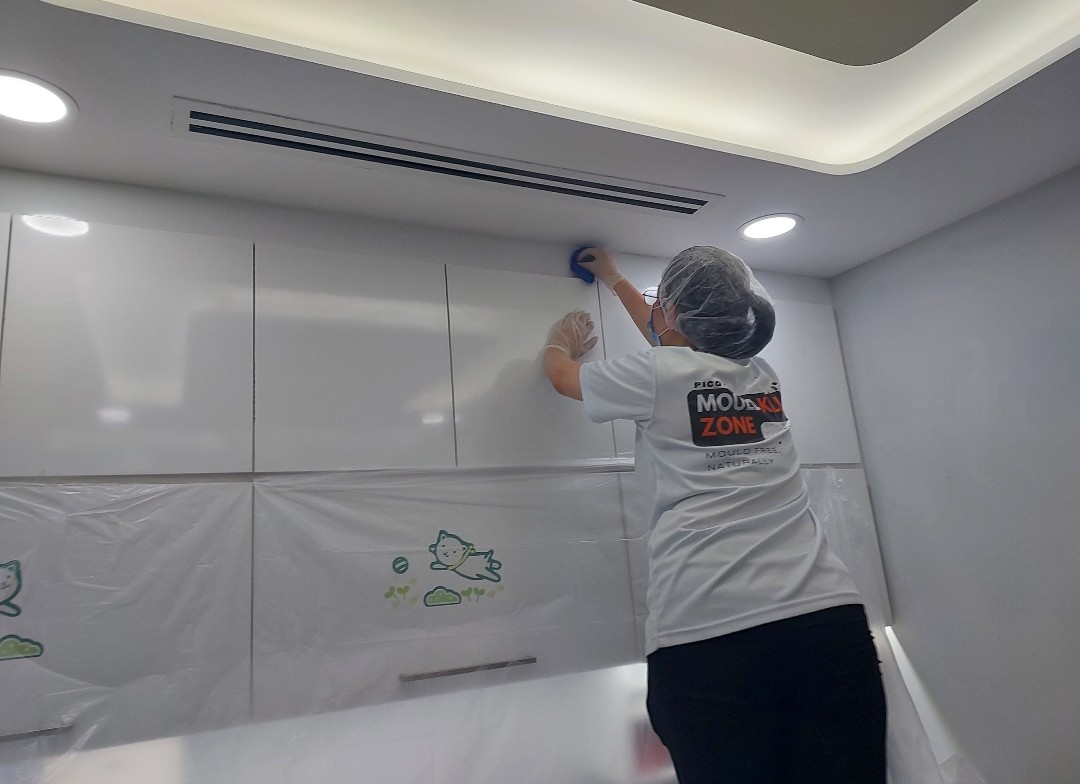
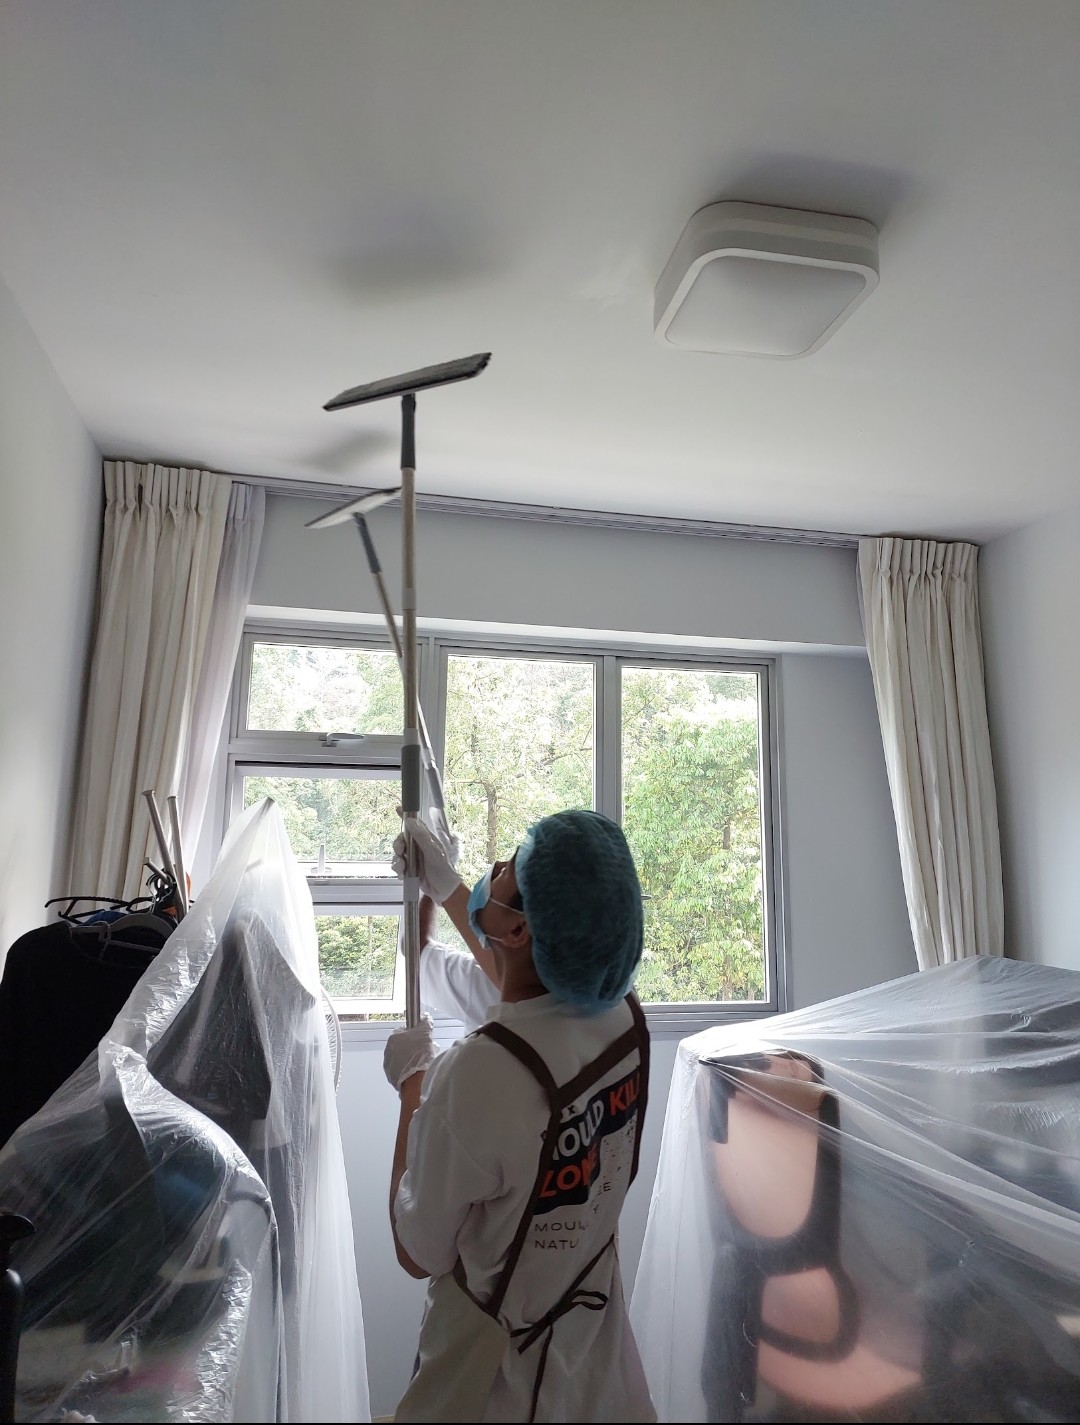
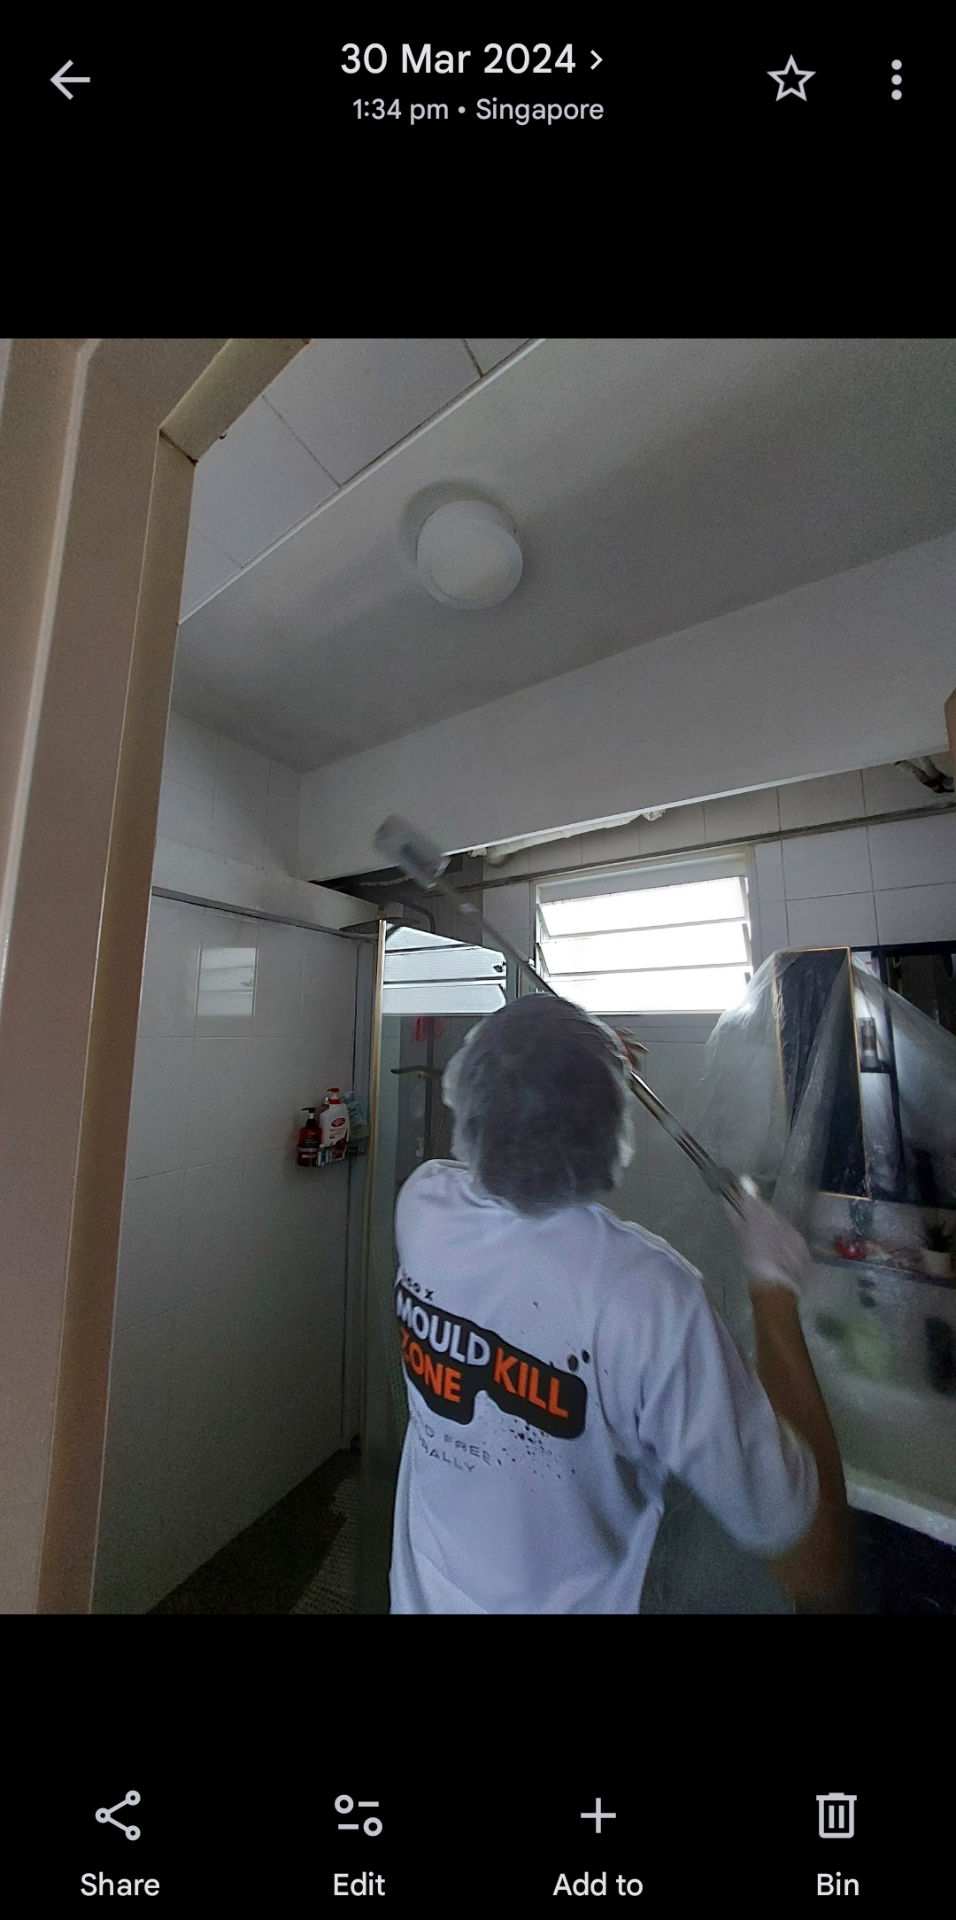
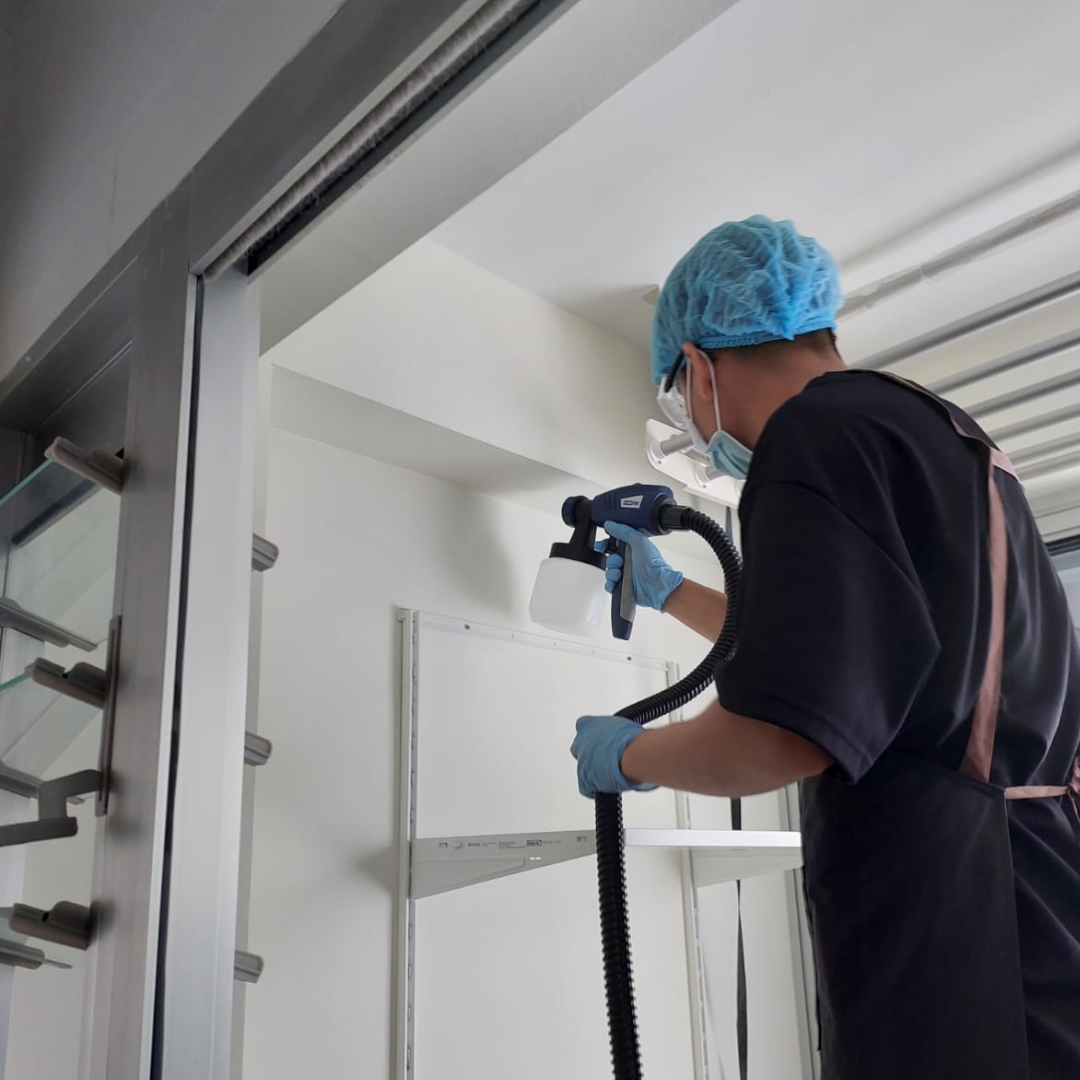
Trained Pico X Health technicians follow strict containment, PPE, and HEPA protocols on every job in Singapore.
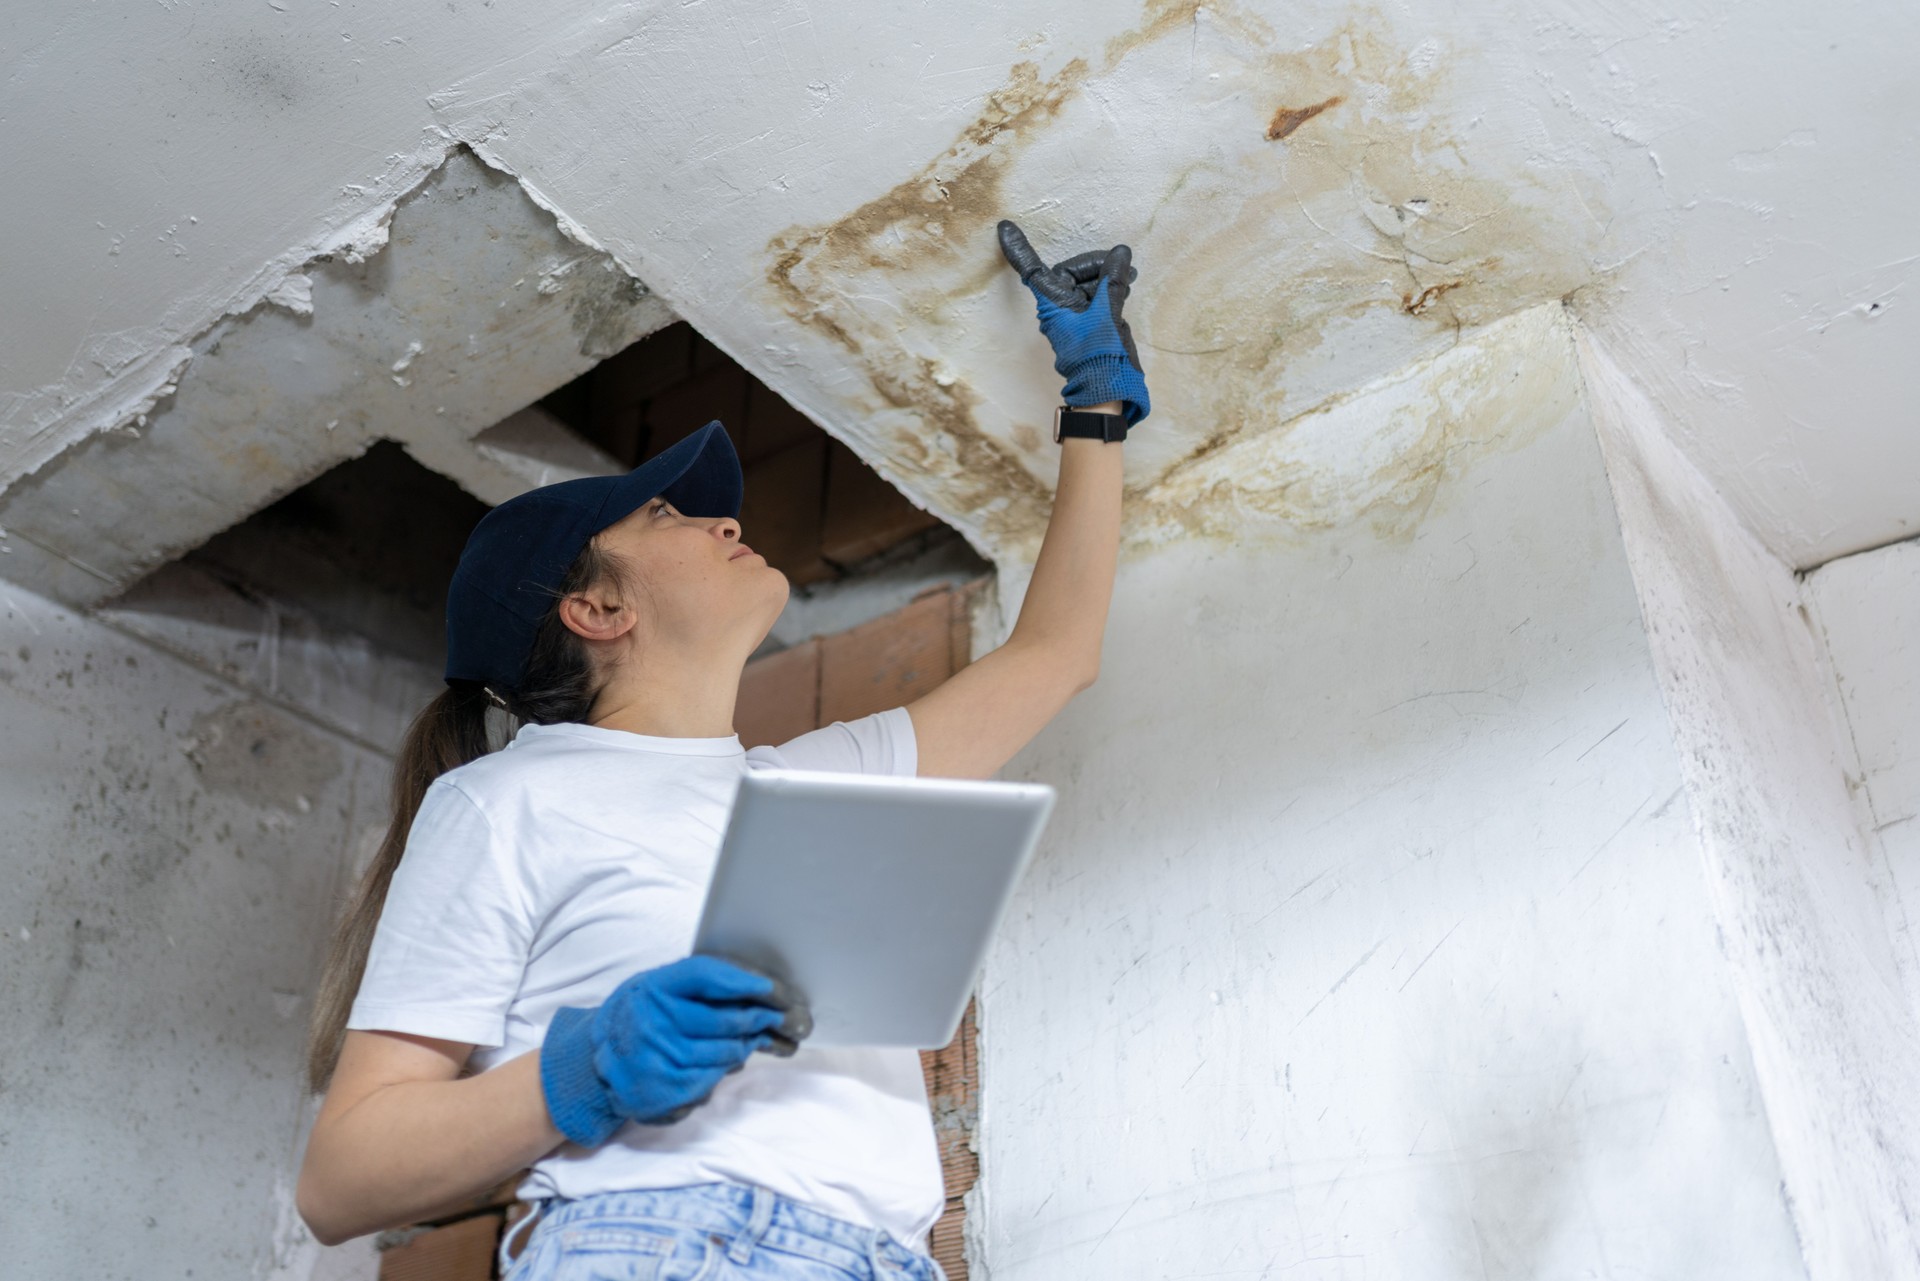
Moisture mapping reveals hidden damp before remediation begins.Full PPE — P100 respirator, goggles, suit — protects technicians and your indoor air.Plastic containment isolates the work zone so spores cannot migrate.Anti-mould treatment applied to kitchen cabinetry next to the aircon coil.HEPA-filtered sander removes the contaminated paint layer cleanly.Anti-mould paint sealed around bathroom ceiling pipes — the most common HDB hotspot.Extension tooling reaches the full ceiling without moving the homeowner's furniture.HVLP sprayer lays an even anti-mould barrier across treated ceilings.
Before & After: Real Singapore Jobs
Documented mould remediation across HDB, condo, landed and commercial spaces.
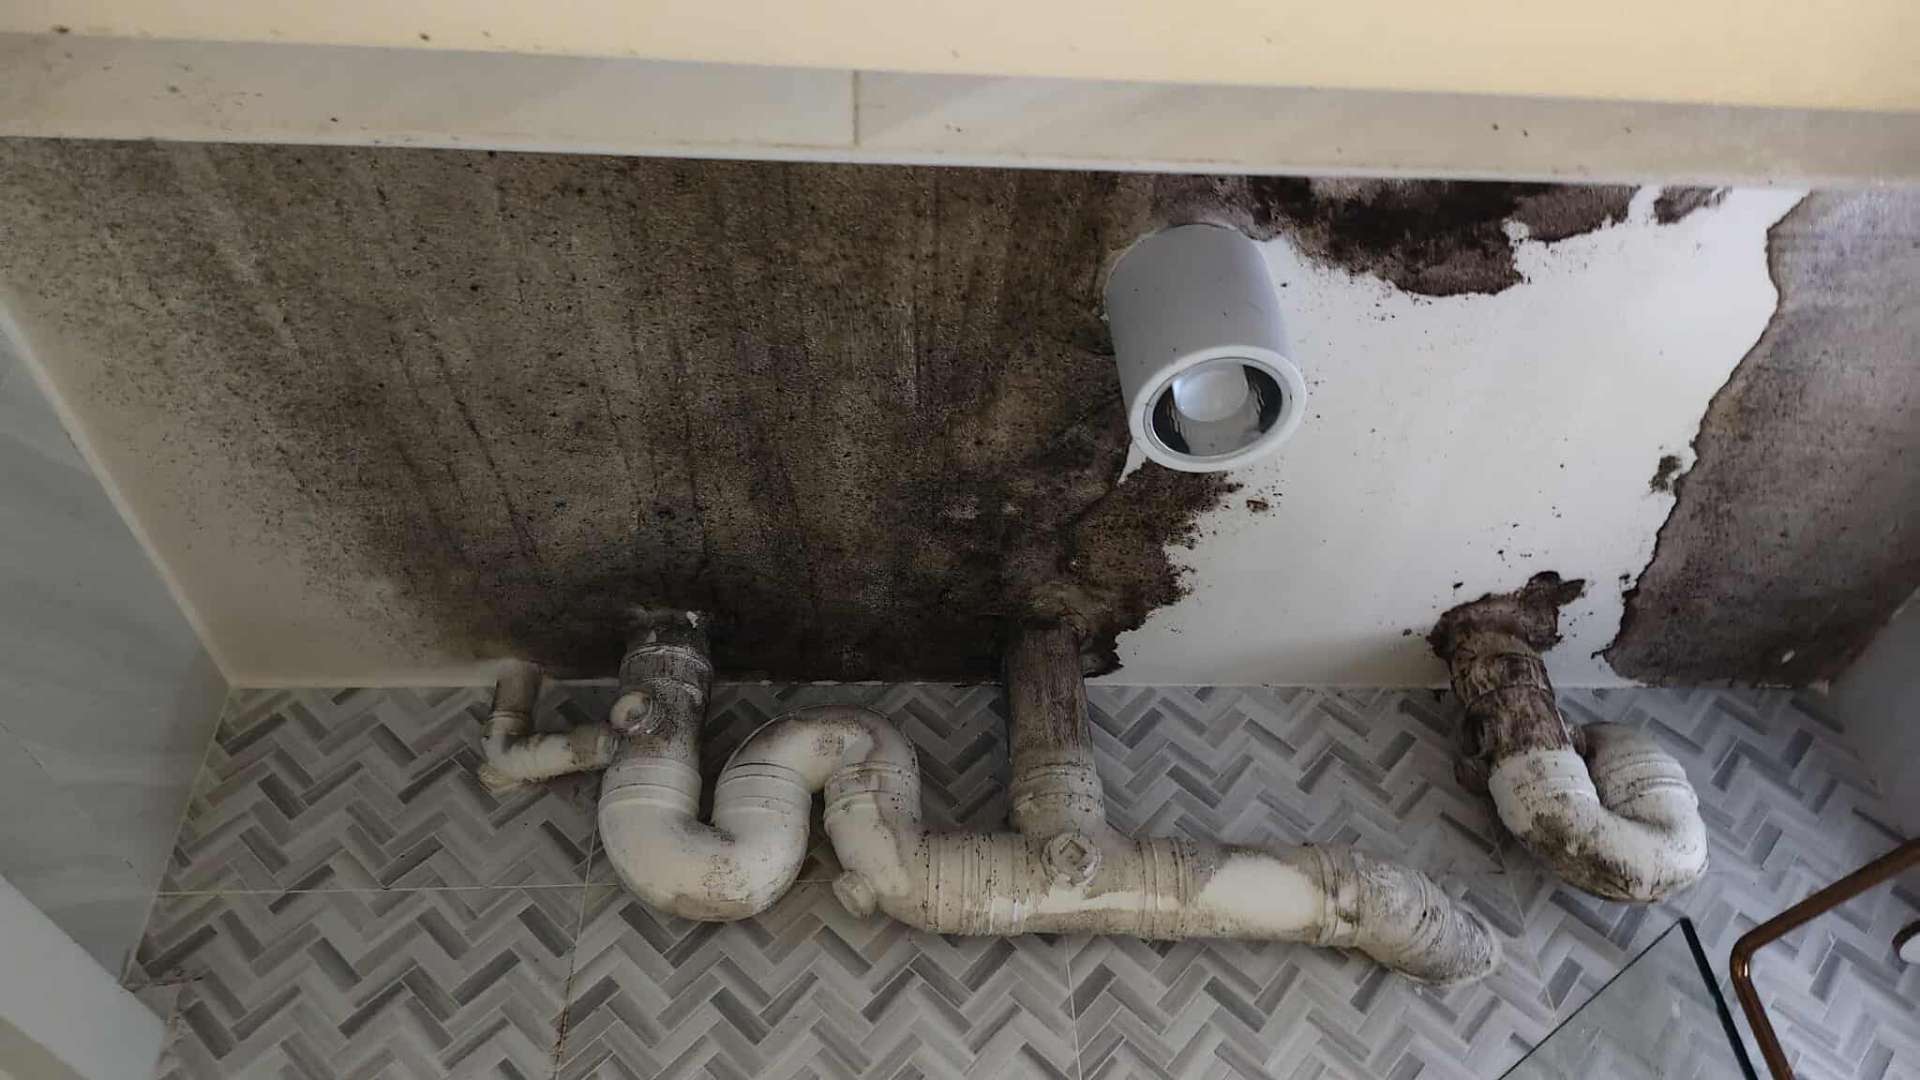
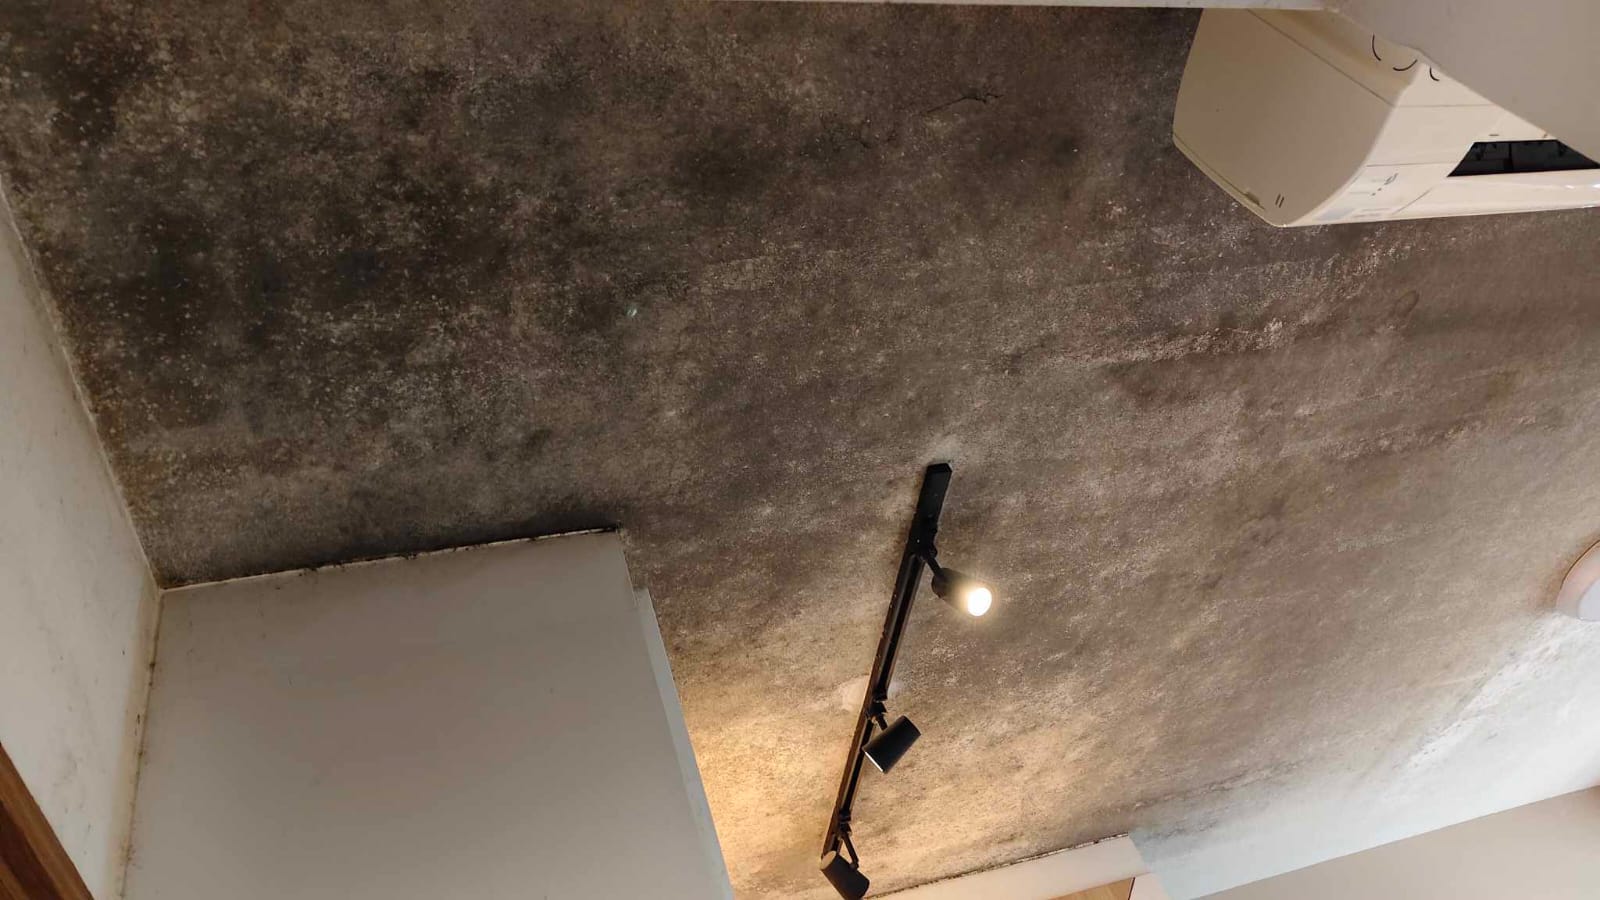
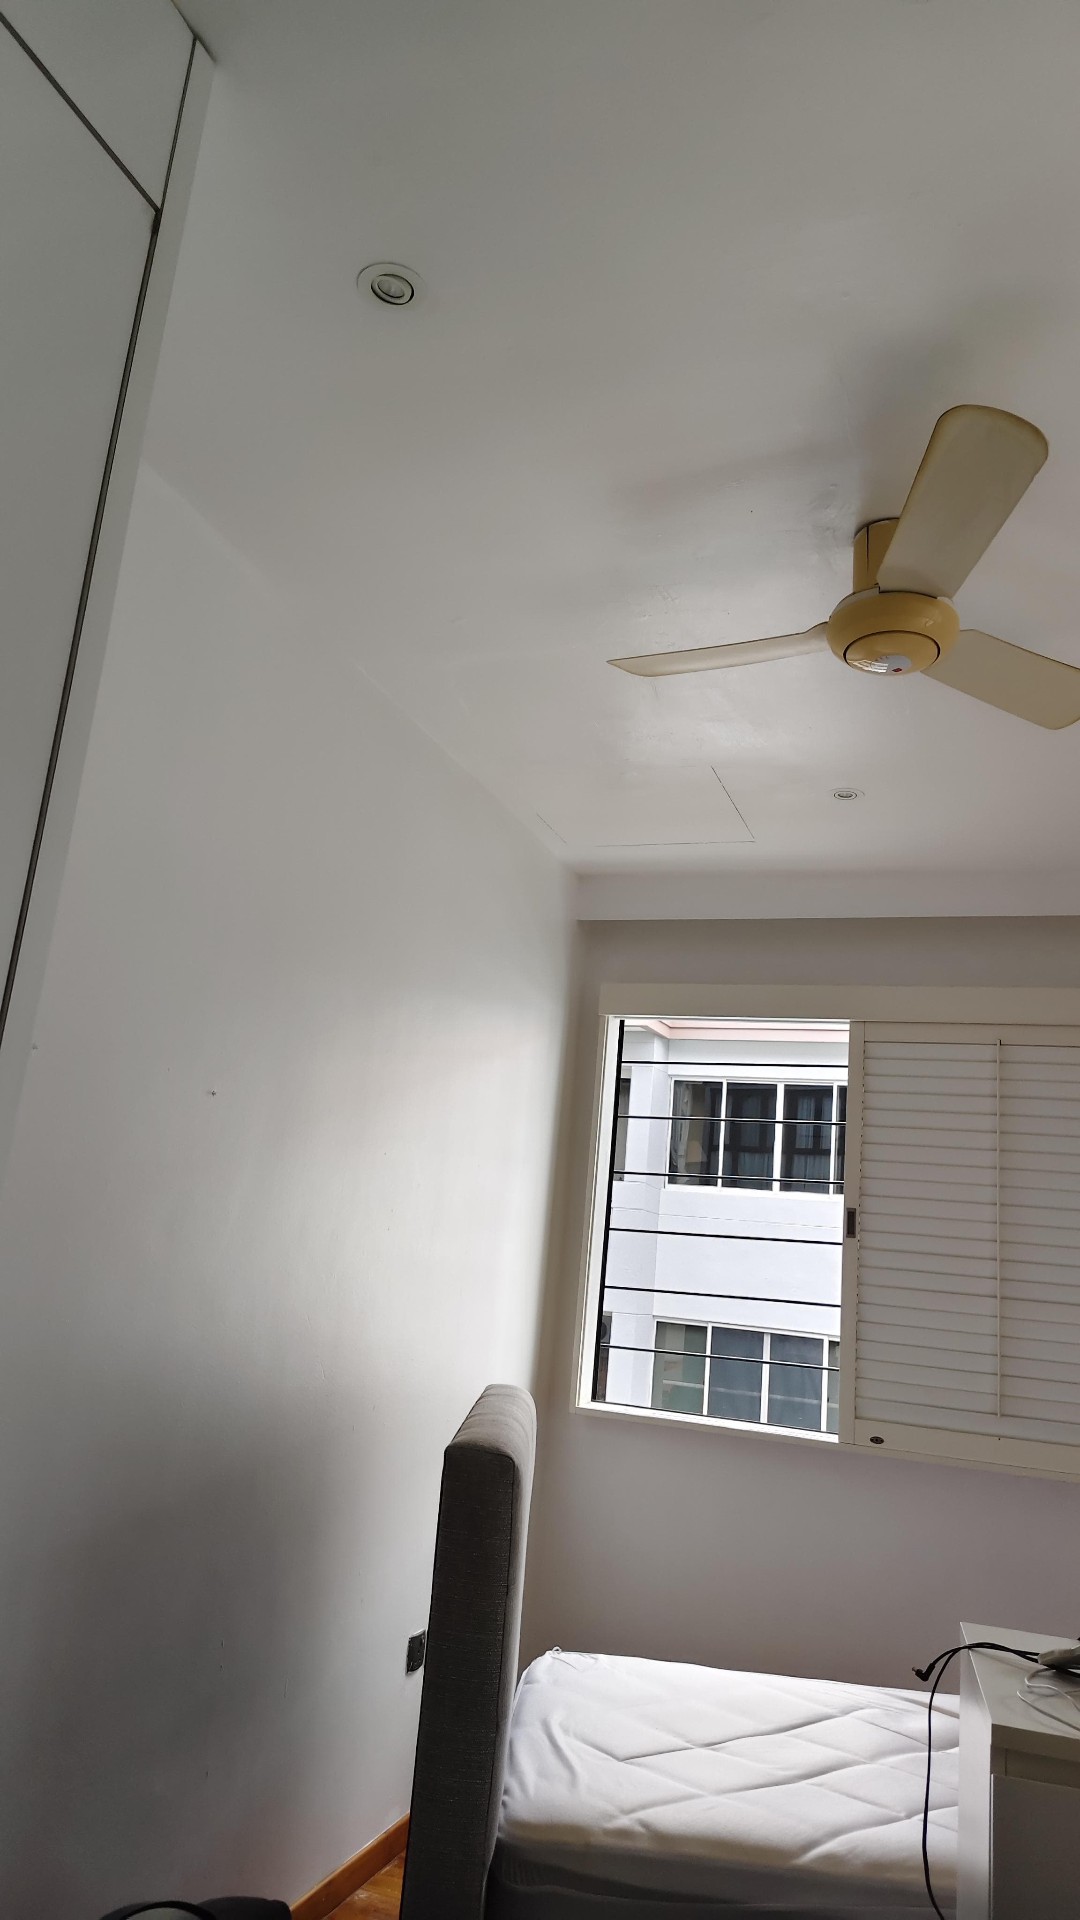
Before — severe ceiling mould around bathroom pipes.After — clean ceiling, sealed pipes, anti-mould coating in place.Before — black mould near the bedroom aircon.After — restored ceiling, mould-free for the long term.Before — staining and mould around the ceiling fan housing.After — clean, repainted ceiling around the fan.
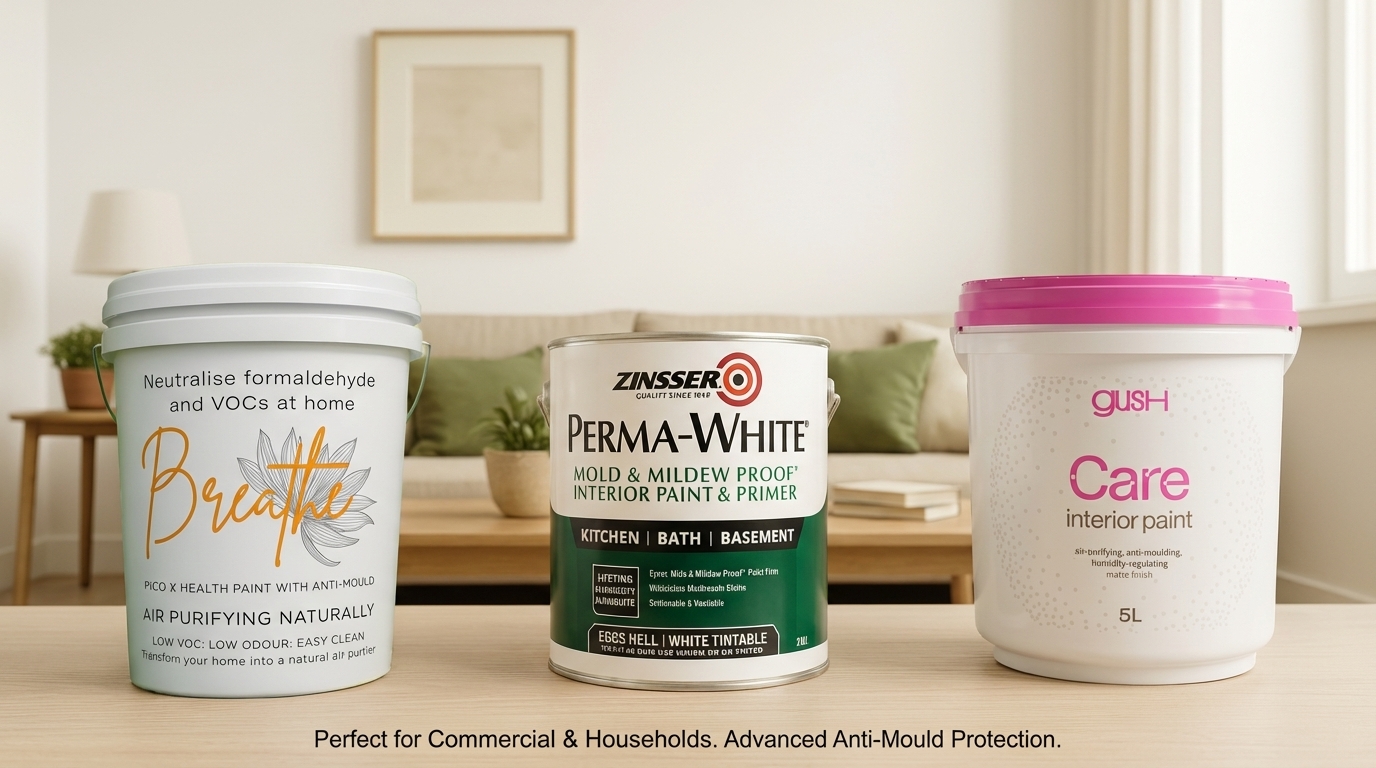
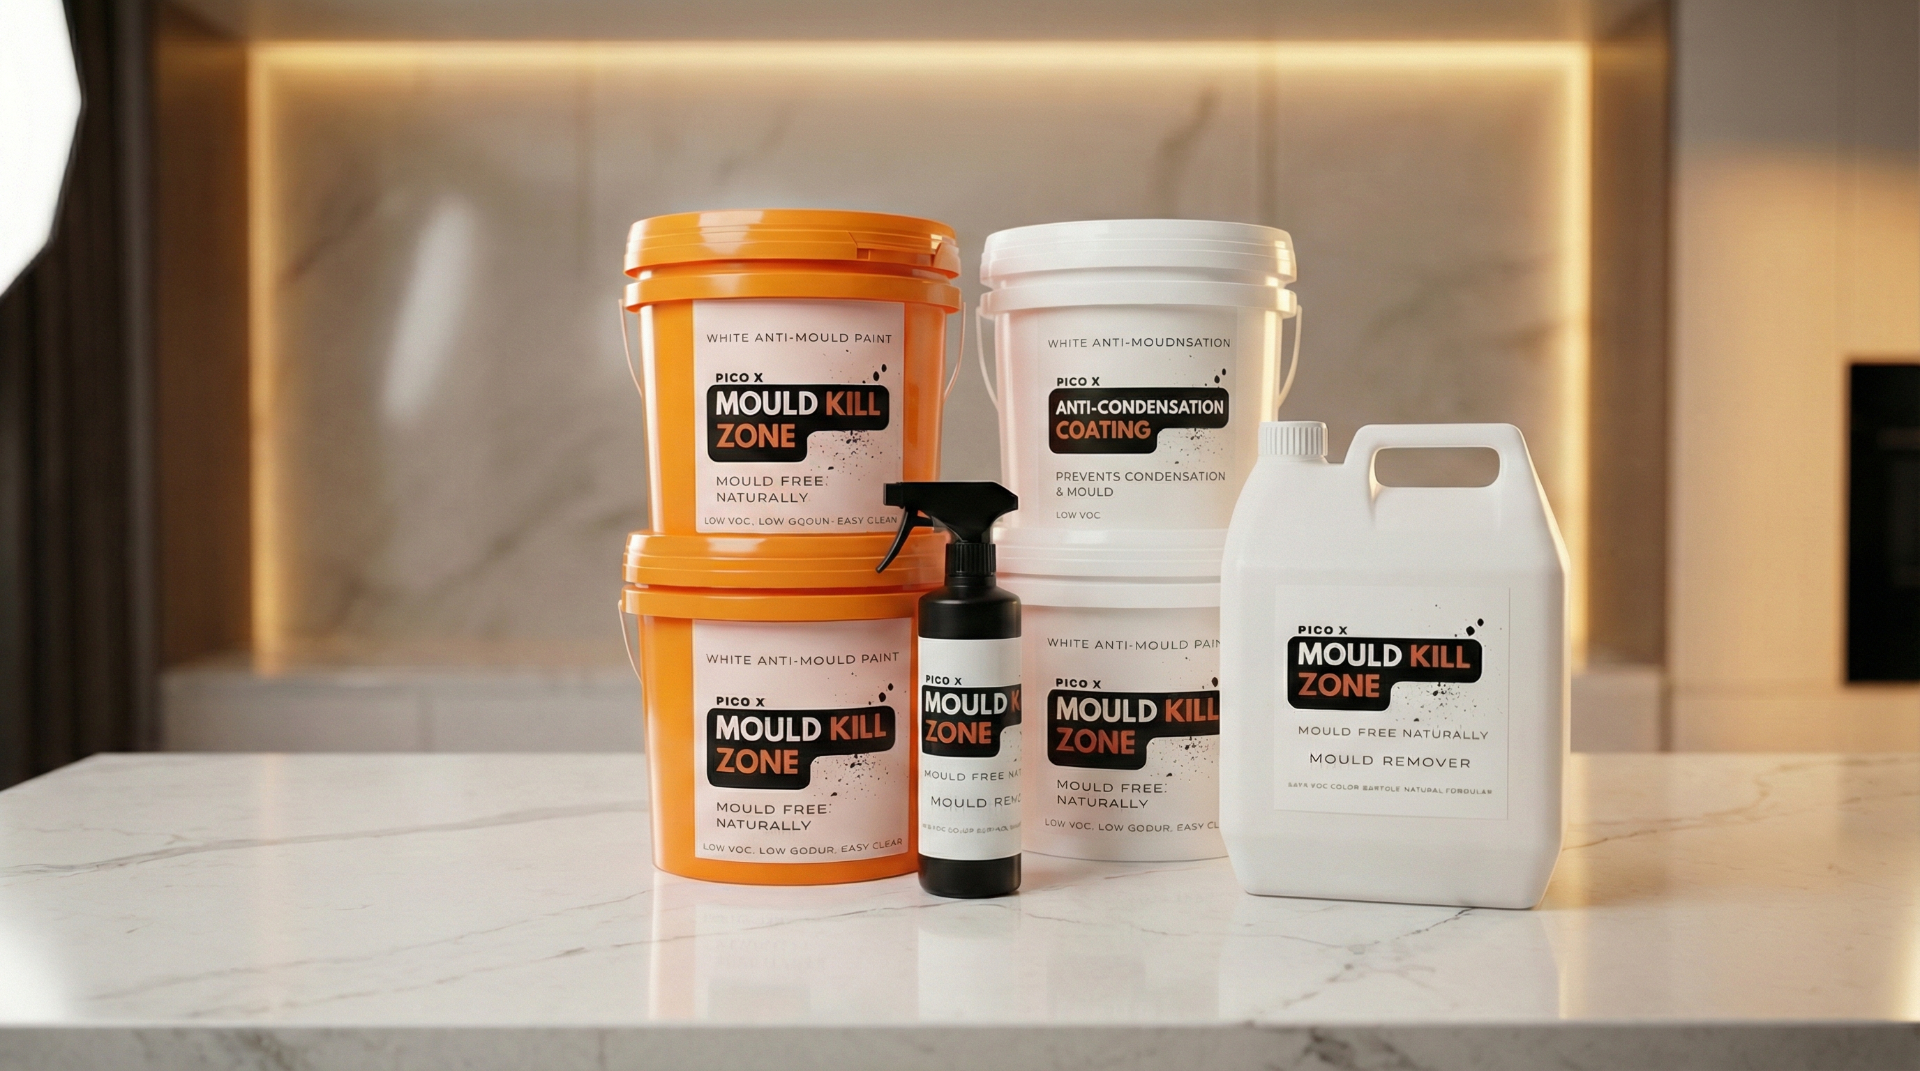
Products We Use & Recommend
Professional-grade equipment and coatings selected for Singapore's humid climate.
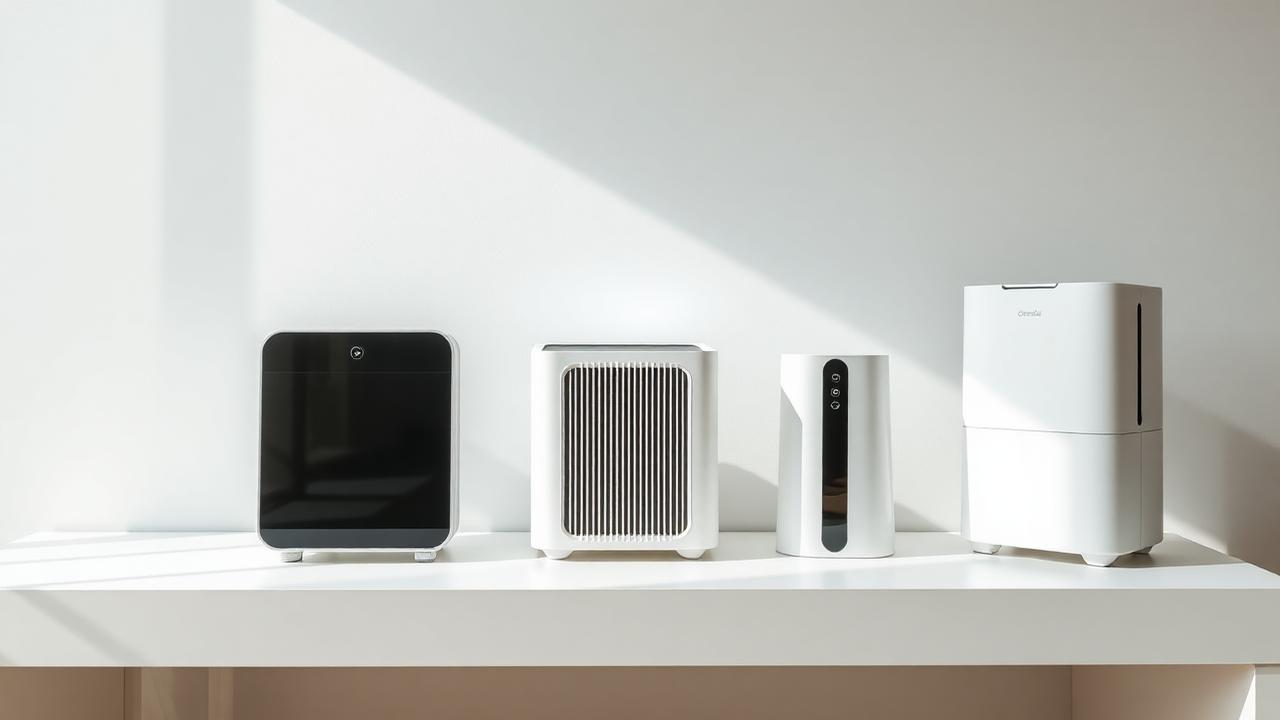
HEPA air purifiers and industrial-grade dehumidifiers for tropical Singapore homes.Recommended anti-mould paints: Breathe, Zinsser Perma-White, and Gush Care.Mould Kill Zone range — Anti-Condensation Coating, Anti-Mould Paint, Anti-Mould Coating, Moldicide Spray, Mould Remover.
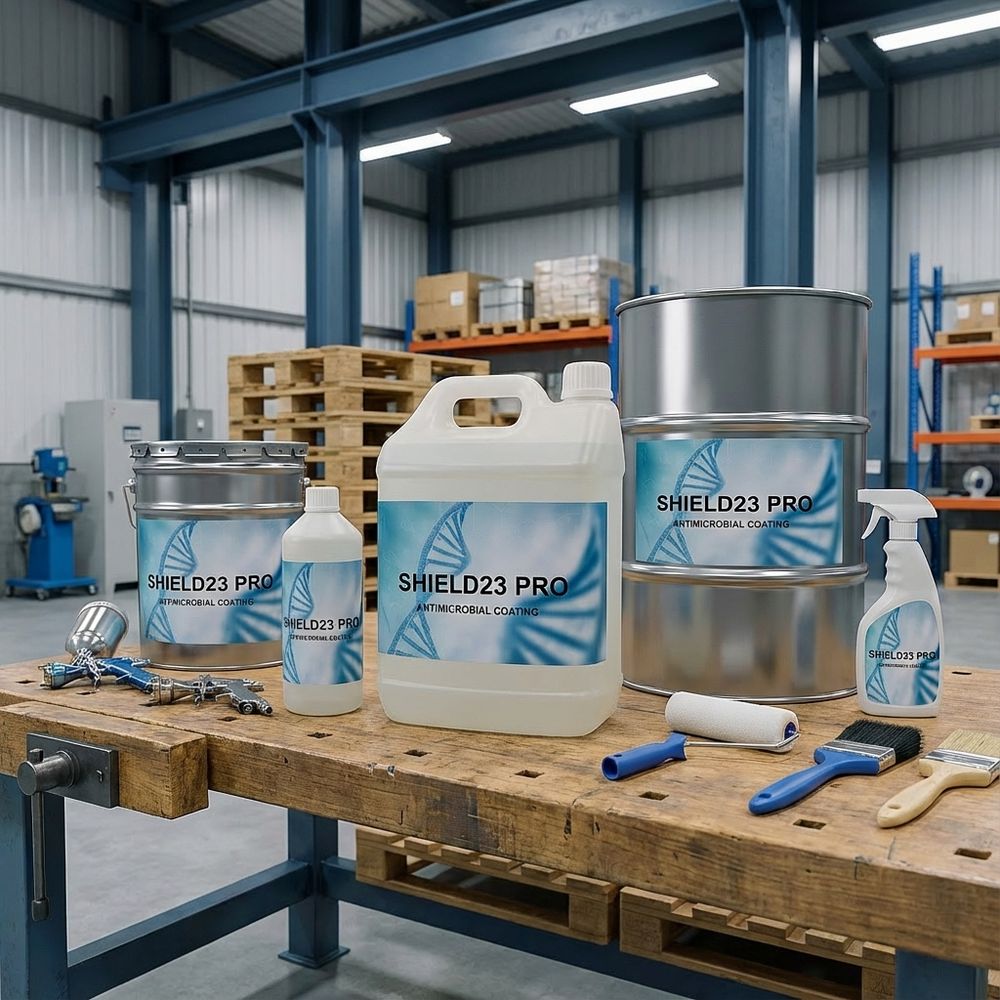
Shield23 Pro — Antimicrobial Coating
Long-life inorganic-ion defense applied by trained Pico X Health technicians across hospitals, F&B, schools, and homes.
Shield23 Pro inorganic-ion antimicrobial coating — 99.9% pathogen reduction for 6–12 months.
Recommended Services
Pico X Health services most relevant to this topic.
Professional Aircon Trunking Mould Treatment Protocol
The 6-step protocol our technicians follow on every job — diagnosis through long-term prevention.
Step 1. Diagnose moisture source
Identify whether the mould stems from a leak, condensation, or a ventilation failure. Use a moisture meter on the substrate and thermal imaging on ceilings to separate cold-bridge condensation from active water ingress.
Step 2. Set up HEPA-grade containment
Isolate the work zone with plastic sheeting and run a HEPA-filtered negative-air machine. This stops mould spores from migrating to other rooms during removal — critical in occupied homes.
Step 3. Physically remove visible mould
Wet-wipe and HEPA-vacuum all visible growth. For porous substrates (gypsum, soft plaster), cut out and replace the affected section. Never dry-brush dry mould — it aerosolises the spores.
Step 4. Apply antimicrobial treatment
Saturate the surface and a 30 cm buffer zone with a hospital-grade antimicrobial. Allow full dwell time (typically 10–15 minutes) before wiping down.
Step 5. Seal with anti-mould primer + finish coat
Apply an anti-mould stain-blocking primer (e.g. Zinsser Mould Killing Primer) followed by a low-VOC anti-mould topcoat such as Zinsser Perma-White, Gush Premium or Breathe.
Step 6. Address the root cause to prevent recurrence
Fix the underlying driver — repair waterproofing, re-insulate aircon trunking, improve ventilation, or right-size a dehumidifier. Without this step, mould returns in 6–12 months.